HOW TO CREATE YOUR OWN SQUAD
What a great project for you and the kids to do together!
Wayne's Hot Wheels Squad
Fred's Model Squad
Paul's Lego Squad
Bill's Lego Squad
Jim Costa's Full-Scale Squad
Also,
check out JOBT Decals who sells Squad 51 decals.

ruleta.
Wayne's
Hot Wheels Squad
 As many of you know Hot Wheels has issued a limited
edition Squad 51 that retails for around $20. What you may not know is that they are using
the same mold on the "Rescue Ranger" and "Bomb Squad" models, both of
which sell for the standard Hot Wheels price of 98 cents. I have found the rescue and bomb
models to be plentiful at most Wal-Mart and K-Mart locations.

Materials: Once you have located a
"rescue " model to convert it to Squad 51 you will need the following materials:
fine hobby sandpaper, model kit paint brush, masking tape, hobby knife ( x-acto or other
brand), model kit paint in the following colors: gloss red, flat black, and silver.
Step 1 : Mask off the windshield with tape
, use the knife to shape the tape to fit.
Step 2: Lightly sand the metal body in
preparation for the paint. Since these models begin life painted white a light scuffing is
all that is needed to make the paint adhere well. You may want to sand deeper over any
printing or stripes on the original paint so they will not show through your red top coat.
The plastic areas of the model do not require sanding as the model paint will adhere very
well here.
 Step 3:Now you are ready to paint
. Leave the windshield masked and carefully paint the metal body red ,you may wish to
apply two coats for even coverage . The grille and front bumper are painted silver along
with the center of the bed on the utility box. The bottom of the squad can be painted
black.
 Tips: Now some "do's" and
"don'ts" Do take your time. Don't get discouraged. Good results can be achieved
with a little time and care . You can add as much or as little detail as you feel
comfortable with. Such as with my model you may choose to buy an additional bottle of
yellow to paint the SCBA tanks with. One other tip in closing ,for finer detailing or
tight areas you may wish to have an additional brush on hand trimmed to a fine point with
a scissors.
If you have any additional questions or comments you can
e-mail me at : wayne1701@yahoo.com and I will do my best to answer them. Have fun with
your "home made" squad. Hope this will work for you.
Wayne


Additional Tips from Larry:
here is a way to get a smoother paint job - as long as you don't mind ruining one
or two test cars along the way! I've repainted both Hot Wheels and Matchbox cars for
years, and here's how I do it…
These cars are usually held together by two pins that look like small rivets. Occasionally
three, maybe even one. What you do is take a small drill bit, just slightly wider than the
pin, and drill the pin out. Not all the way - just enough to pull the chassis off. Make
sure the drill bit is designed for metal. If you have a variable-speed drill, so much the
better. Use a slower speed. VERY IMPORTANT - Nowadays, these cars usually have a
chassis made of plastic. Extreme care must be taken, or you can destroy the chassis.
(Practice on a few junk cars first.) Less chance of damage if the vehicle has a metal
chassis.
Once the pins are drilled out, the entire vehicle can be taken apart. Soak the car's body
in nail polish remover for a while, and the paint comes right off. Use an old toothbrush
to get as much paint off as you can. Rinse the body off, then use another toothbrush, with
soap and water, and clean it inside and out. Put aside to dry. IMPORTANT - Try not to
leave the car in the remover any longer than overnight. If you leave it in for a few days
or more, the body itself will get damaged. In all the time I've been doing this, the paint
on a brand new vehicle comes off with no trouble in a few hours.
Once the vehicle's in pieces, you can detail each part as you wish. Before you paint the
body, spray a coat of primer on it - you'll get a better finish that way.
When you put the vehicle back together, this is where the pin comes in handy. You want to
have enough left of the pin to still come through the chassis. A small dab of epoxy in
each hole, when it dries, does a great job holding everything together.
If you don't want to risk destroying your future squad, by all means follow Wayne's
instructions. As long as you have a steady hand, you'll get a great-looking squad.
I'll try to get some pics of my own vehicles to illustrate the process. In the meantime,
if anyone has any questions, just e-mail me.

Fred's Model Squad
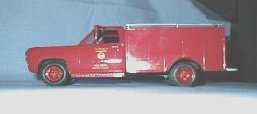
 It all started with a 1978 dodge
p/u,the oldest I could find. Chassis had to be cut & stretched to a 1 ton length. The
Squads body was fabricated from 20mil sheet styrene,copied from taped episodes as you can
see its not finished. All most every thing had to be hand made from the running boards to
the mirrors.Even the beacon lights had to be made from scratch.Tinted red with clear red
paint. The decals were custom made from a print shop in our area. -Fred


Paul's Lego Squad
Created by Paul Foster (visit Paul's Web Site for more Lego
creations)

Click on thumbnails below for alternate close-up views.


You can also visit Station 51, Squad 51 and Engine 51 created by Eric S. McDonald at the Lego City Fire Department

Bill's Lego Squad
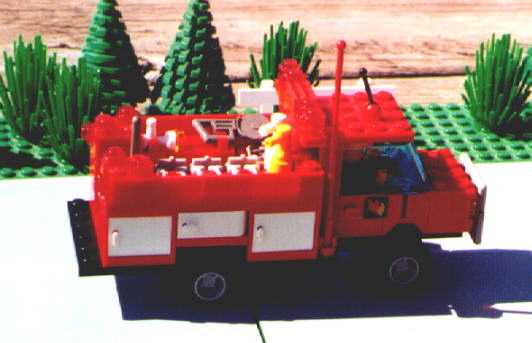
I especially got a kick out of the Lego models of the Squad, as
I have just made one myself. Here are a few pics of this work-in-progress…(see
attached) I thought you'd get a kick out of these. If you'd like, you can use
them in the "Fun & Games" section of the site…all I ask is a name credit and a
website mention. "Legomercency! courtesy of Bill Robert -
www.billrobert.com"
Cheers!
Bill Robert


